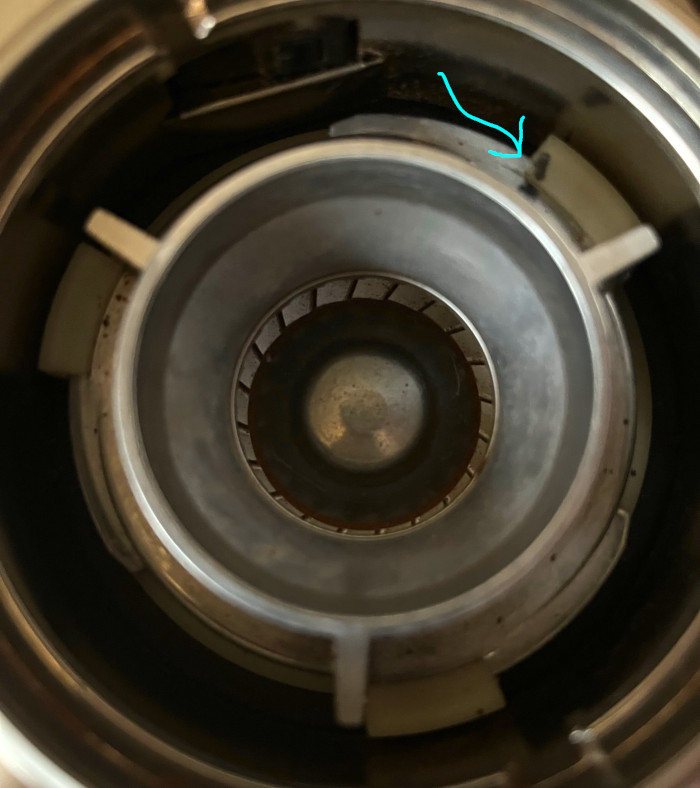
Was your initial wipe pattern before shims left/right or front/back? Mine was left/right which means it’s not a belt-tensioning issue. I think my first attempt wasn’t thorough enough and I finished with a 4/4/2 pattern or something similar to yours. Then I realized I should have been more meticulous and did another pass that took probably closer to two hours and involved marking the orientation of everything. You also need to do a very good cleaning because coffee particles can completely throw this off. Be extra sure there’s no coffee between the upper burr carrier and the ring it rests on when you place it in the machine.
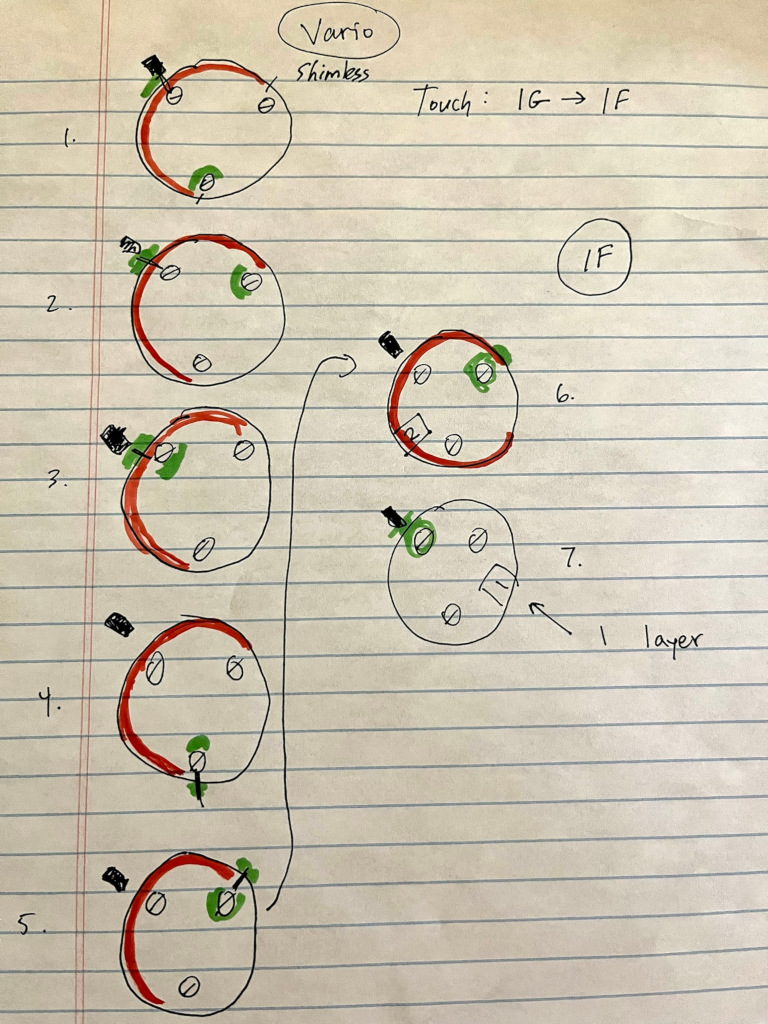
(1) I used a permanent marker on the upper burr carrier and the tab it slides under to make sure I was putting it back into the machine the same way each time.
(2) I used a non-permanent marker (dry erase) to mark the edge of the upper burr itself and carrier to note the position of the burr within the carrier. Had to be careful not to wipe this off accidentally.
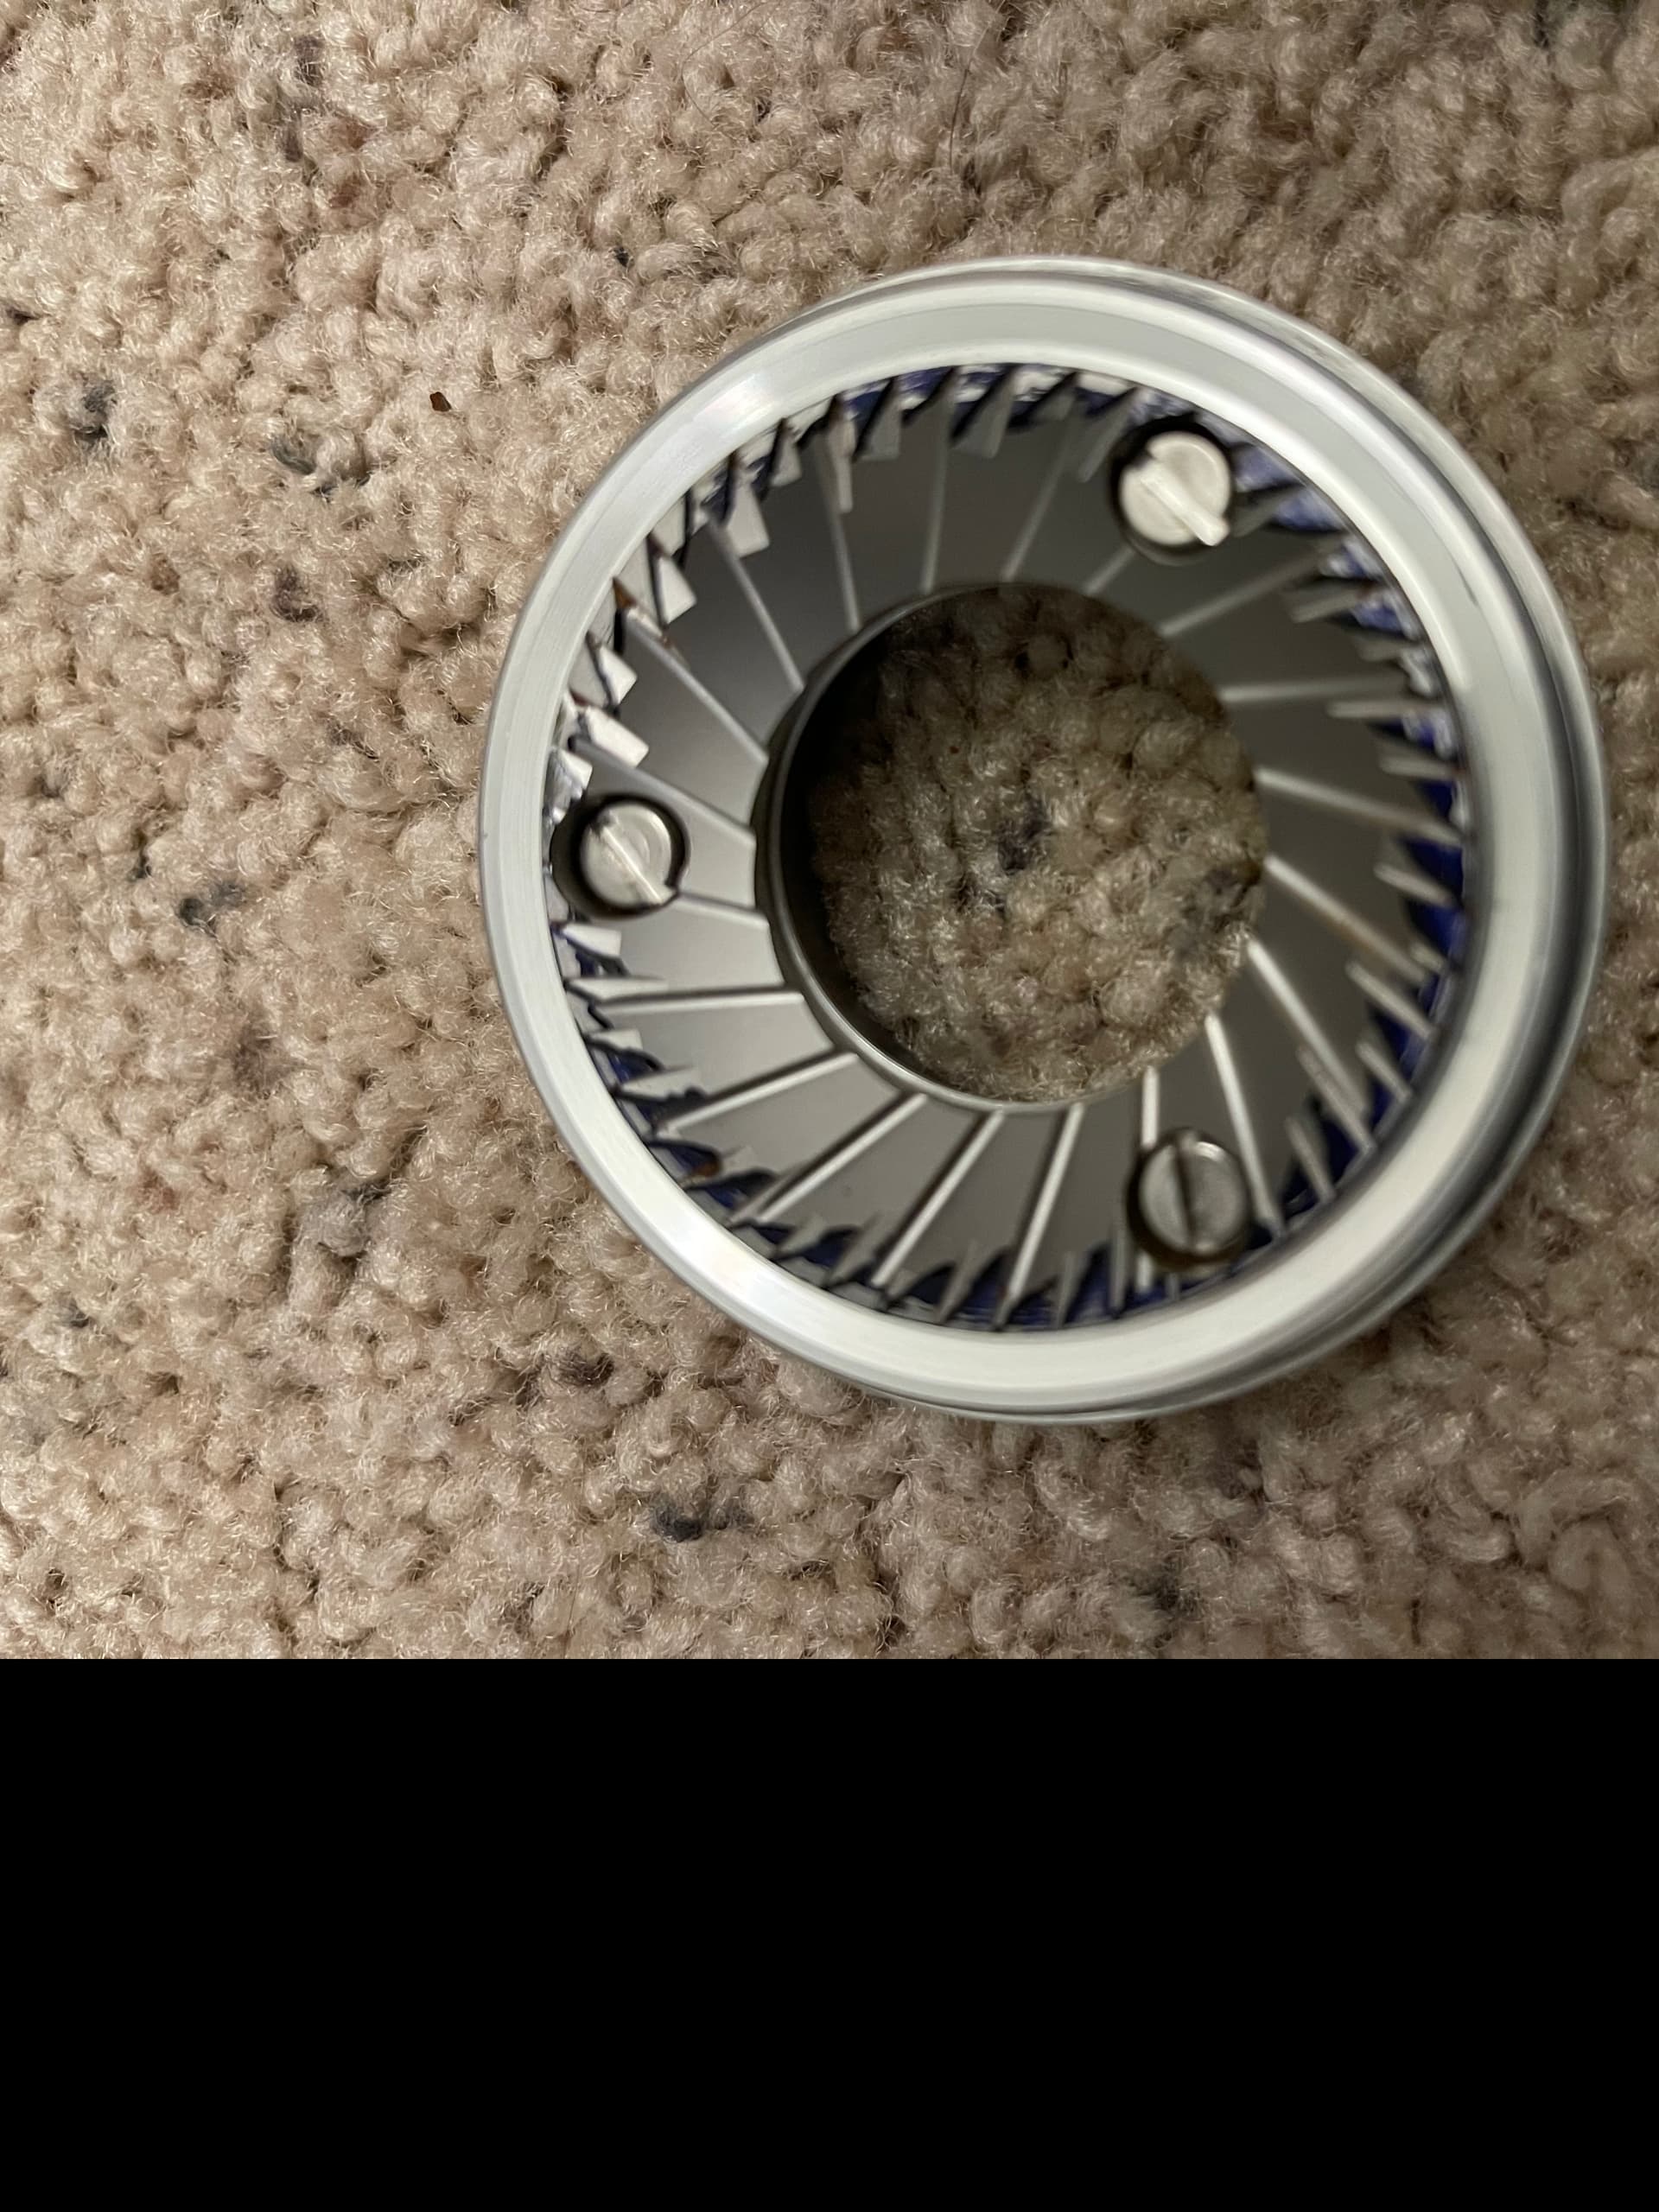
(3) Then I removed all shims and tried all of the combinations of both the burr carrier’s position in the machine and the burr’s position in the carrier. Be careful not to over torque the screws when tightening because that will definitely affect the alignment. I held the screwdriver by the shaft instead of the handle. Then I drew out most of the alignment combinations on paper which you can see below (didn’t draw out every combo for reasons I don’t recall). This view is looking up at the upper burr from the bottom of the machine and calibrated to a 1F zero point:
(a) The large outer black mark is the permanent mark on the burr carrier tab inside the machine.
(b) The smaller black dash is the mark on the upper burr carrier.
(c) The green mark is my non-permanent mark noting alignment of a screw with the burr carrier.
(d) I’m assuming the red is ink that didn’t wipe. That doesn’t really make sense based on the final drawing in (7), so either something’s missing here or I marked it wrong. Most likely it’s just marked incorrectly and the shim is located in lower left position. You can clearly see that it was the left side that wasn’t wiping in earlier photos I posted (*).
Changing the orientation didn’t seem to affect anything much, but that isn’t always the case. I’ve seen people post on HB who got most of the way home with this method. However, I was somehow able to get down to just one layer of foil in one location to get a clean wipe after doing all of this. Not sure why but I suspect proper cleaning and carefully tensioning the screws evenly might have a lot to do with it.
(*) My initial wipe pattern. Black position marks for machine orientation would be top left like the drawings.
Thanks. I’m doing another pass at this now. Just cleaned the machine pretty thoroughly, removed all shims, and am starting from scratch with even s screw tensioning as you suggested.
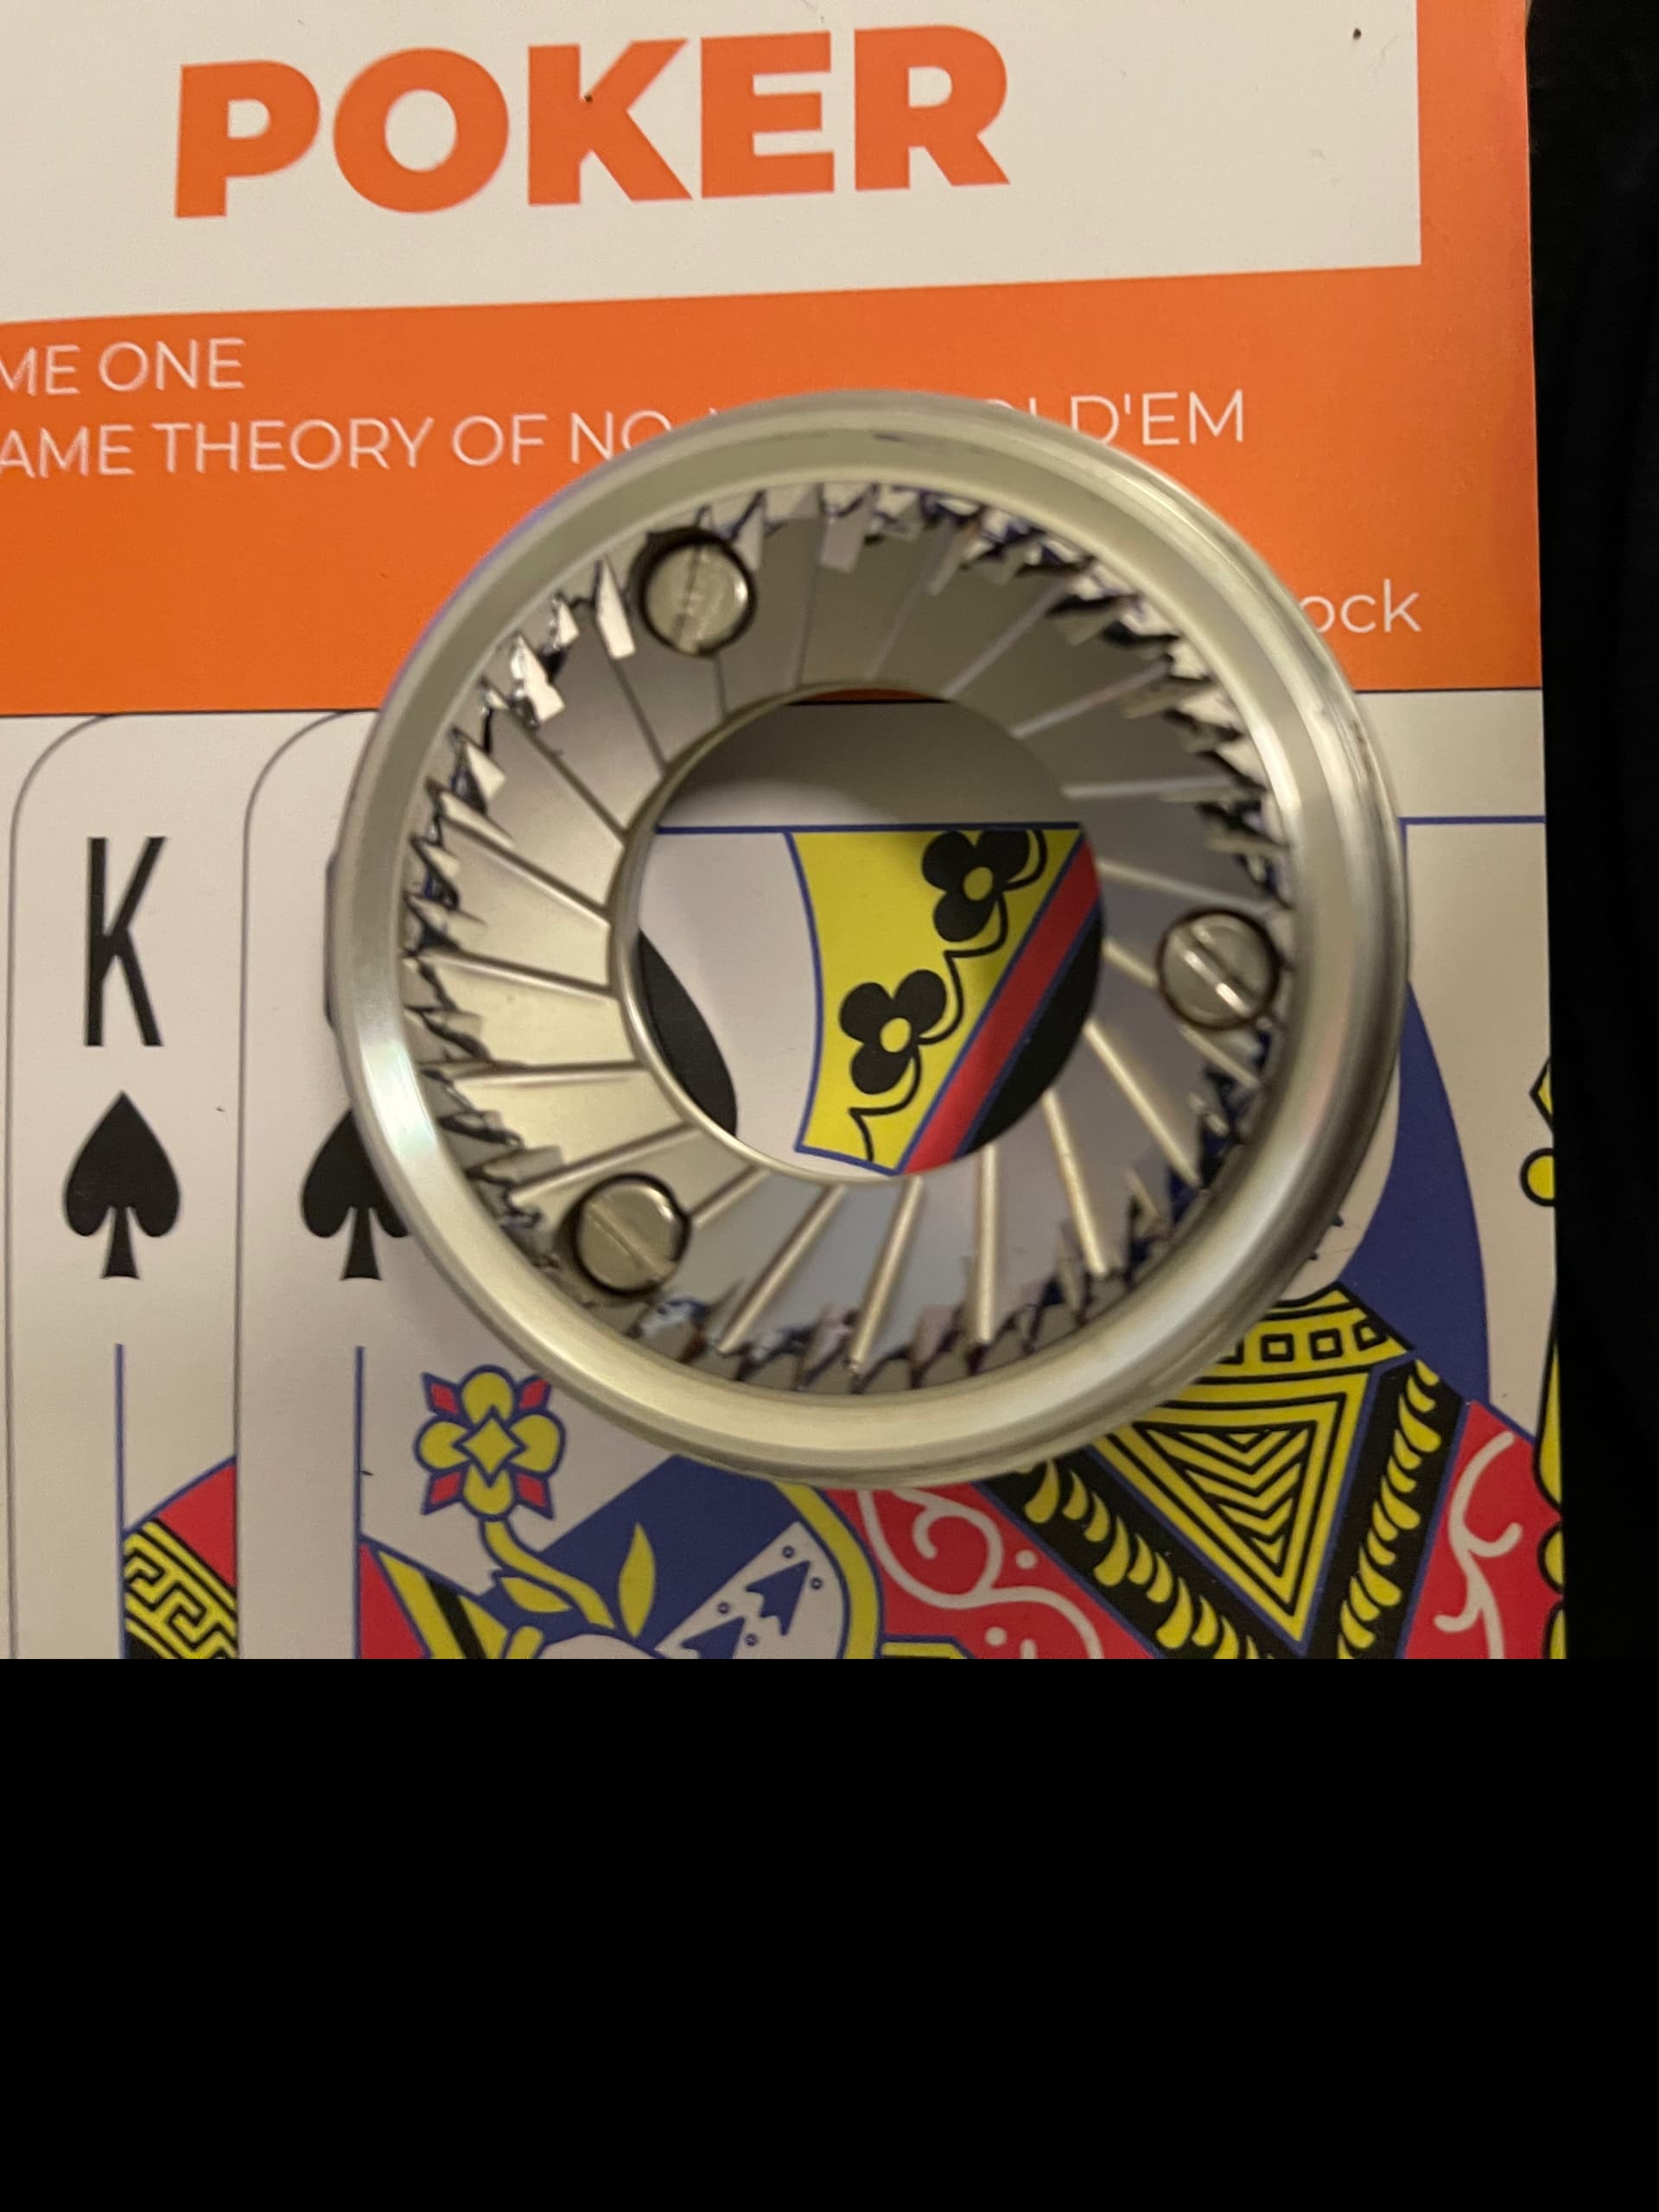
Initial wipe pattern seems really bad. Image is rotated for some reason after upload. The small bit of wipe is just to the right of the screw that is at the back of the machine at the 12 o’clock position when the burr carrier is inserted
2 hours later and 2 doubled over pieces of foil directly opposite the 12 o’clock screw and I’m happy with the result. Looking forward to seeing how it tastes tomorrow.
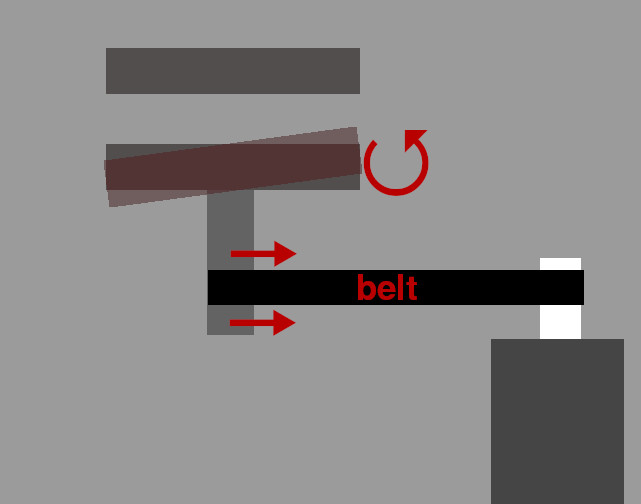
12 o’clock could be a belt tension thing. The belt sits behind the driveshaft assembly and pulls BACK on the axle of the lower burr carrier iirc. That means this can happen (working from memory on the drawing here):
So clearly you can see how that pattern could occur if the belt is slightly too tight. The belt tensioning mechanism is one of those things that’s difficult to describe but easier to understand if you do it. Anyway, if you decide to go that route (I think you should), then you should familiarize yourself with the Alicorn method and attempt to do that since getting to the belt adjustment is going to be about the same amount of work. Shimming might work here but probably not the best technique for front-to-back misalignment.
first cup out of the + was not great, very muddy. tempted to switch the burrs out before I send the W+ back, honestly not sure if they’d notice or not. Still will need at least a shimming regardless of what burrs it has since there were notably more fines than what I saw with the W+ but we’ll see what the next cup looks like.
The Kruve distribution was about 5g out of 20 smaller than 800 micron, most of which was caught by the 500 micron filter - less than a gram passed through that.
So not that different from where I started with the ceramic
Taste of the first cup is hard to compare since of course I do this right as I have to switch beans. But the coffee bed still looked a bit muddy. There was some subtlety to the flavor but also tasted a bit over extracted
Today I think I’ll break out all my grinders and get a kruve distribution on each - Fellow Ode with v1 burr, Forte, and Virtuoso+. I’ll need to give some thought to how to get comparable settings but I’m thinking this should be interesting.
The ceramic are supposed to produce considerably more fines. Sucks that the steel burrs sold out everywhere in the meantime. They were in stock when I linked the Baratza spare parts page because I added them to cart. I’m curious about that single doser with bellows so selfishly hoping you get that one and TR it.
The reason I’ve hesitated buying the Kruve is because I’m not sure it’s precise enough to pick up small but meaningful differences in distribution. Have you seen Gagne’s particle size analyzer app that I linked here somewhere? Would be interesting to compare the results of that with the Kruve.
What was your take on the Ode with v1? Do you think it’s a grinder we should be recommending here at half the cost of the new Vario, or wait until the redesigned burr is fully integrated? Obviously it’s upgradeable right away to a (pricey) 64mm third-party set like the SSPs, but I had a few concerns there. First is that the motor wasn’t spec’d for those burrs which may place additional strain on it. Second is that I didn’t see anyone talking about aligning Ode burrs when I was poking around in those threads. Larger burrs are more sensitive to alignment issues, so not sure if that’s something that anyone has looked at.
I was very pleased with it as an upgrade to the Virtuoso. Eventually hype on better stuff and a little bit of frustration dealing with static got to me and I upgraded again though.
The Forte with its grind by weight/time, almost no static, and no clumsy two piece dosing cup has definitely streamlined my coffee making process. So unless I get into espresso or something I’m intent on sticking with the Forte for a while.
Also I appreciate how well designed it is for tinkering. Your images showing how you mapped out the orientation of the burr carrier in the machine made me really appreciate that the Forte burr carrier is engineered so it always locks into place in the same orientation.
I just got a Hario Switch and tried it for the first time today. I had to rush so my cup wasn’t great but it’s a really interesting brew method and I think will be a lot of fun to experiment with.
Yes I saw it when you linked a while back but had forgotten. I might take some photos when I do my experimentation a bit later and see what results I get
yeah, it’s a lot. the first cup out of the box was like a huge pile of mud. I shimmed the burrs and got a pretty damn good alignment and the fines are much lower now, but it’s still a significant amount. I think I will be able to live with it until I find some steel burrs, though. had three cups today after getting the alignment right and I’m pretty happy.